This cake was delicious!! I baked 4 layers and it looked very impressive when served at a dinner party over the weekend. The one negative about the cake, besides the fact that you will have to run a marathon after eating a slice to burn off all the calories, was the gigantic size of each slice. I had to use dinner plates to serve them on since each slice was so tall. Overall, it was a very tasty cake that made mouths drop when I brought it out.
Yield: 1 8in 4 layered cake: 20 servings
2 boxes White cake mix plus ingredients to prepare cake mix (usually eggs, water, and oil)
To make cake:
Prepare cake mixes and bake according to directions. Making sure to grease and flour cake pans so you can easily remove baked cake from pans to cooling rack. Cool completely
(greased and floured cake pan for easy removal)
To prepare Chocolate Covered Strawberries for decoration:
1 pound strawberries
1/2 bag chocolate chips
Wash and cut off leaves from strawberries. Cut strawberries in half vertically. Pat dry.
Melt half a bag of chocolate chips in microwave bowl. Microwave in 30 second increments stirring in between until completely melted. Dip flat bottom of strawberry in melted chocolate. Place on waved paper to harden.
(I did not use a whole pound of strawberries. I just picked the biggest and prettiest ones and used the rest for the strawberry puree)
Prepare Strawberry Buttercream:
6 sticks of salted butter; room temperature
2 Tbsp to 1/4 cup strawberry puree
3 pounds powdered sugar
Blend about 5 strawberries in a blender to make a strawberry puree.
Mix (at high speed) room temperature butter with powdered sugar, alternating and scrapping down sides of bowl. Add enough strawberry puree, to taste, making sure buttercream does not get too runny. I added 1/4 cup to start with and went from there. Buttercream should be fluffy but stiff. (You may need to add a couple drops of red food coloring to get a nice pink shade)
Assemble cake:
Level any cakes that may have cooked unevenly. I usually have a dome cake and need to use a serrated knife or cake leveler to make each layer even. Please save scrapes of cake for husband to snack on while assembling :)
Place one cake layer on cake platter. Spread top with strawberry buttercream for your filling. Top with another cake layer followed by strawberry buttercream. Continue until all cake layers are stacked and topped with frosting.
Spread a thin layer of buttercream around cake sides and top. This will be a crumb coat. It does not need to be perfect and it is okay to see some cake. You are just trying to get a thin coating of frosting to hold your cake together and prevent crumbs from getting on your final layer of frosting. Make sure you are filling in any gaps between the layers and also the bottom of the cake platter. Cool in fridge for 1 hour loosely covered with plastic wrap.
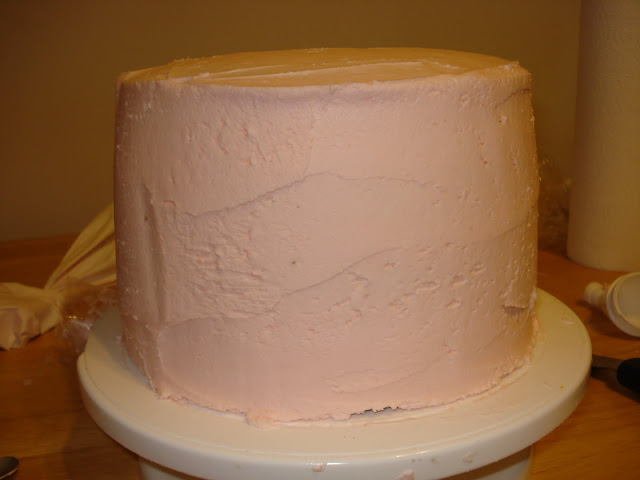
Remove cake from fridge and spread a thick final layer of frosting along sides and top. You can use an off-set spatula or butter knife to spread frosting. It may help to frost cake on a turn table but it is definitely not necessary. Allow buttercream to crust by letting it sit for 10 minutes.
(This is a picture of the final thick layer of frosting before it was smoothed with a a paper towel. Notice that I used a turntable to help spread the frosting and I also used large pastry bags to apply frosting... both are totally optional and can be accomplished with just a butter knife or offset spatula.)
(Instead of decorating directly onto the cake platter, I set my cake on top of 8in cake boards found in the baking supply area of craft stores or Wal-Mart.) Once I was finished smoothing the cake I CAREFULLY picked up the heavy cake using a large offset spatula and my hand.)
(Large off-set spatula and butter knife. Either can be used for applying frosting to cake)
Next, lightly touch buttercream and if it is not sticky then it has crusted. If you are trying to get a perfectly smooth cake here is an AWESOME TIP I use for making my wedding cakes. Take 1 sheet of a Viva brand paper towel. Lay along side of cake. With your hand, Gently rub the side of the cake smoothing out any lines. Start smoothing on the sides and then finish off with the top of the cake, trying to get smooth edges. The heat from your hands helps to melt the butter just enough to make it fill in any bubbles or lines. You should be able to use 1 paper towel for the whole cake. If frosting comes off onto paper towel you are either pressing too hard or it did not crust completely.
(Here the Viva paper towel is against the side of the cake and my hand is gently rubbing to smooth out any lines or bubbles)
Lastly, take chocolate covered strawberries and place around the bottom of the cake. I also covered one whole strawberry in chocolate to place on the top.
(This above picture is the true shade of pink for the frosting. You may need to add a couple of drops of red food coloring to get it this pink since adding more strawberry puree will loosen the frosting too much)
Serve to your sweet-toothed crowd and enjoy with a glass of cold milk!
Sweet Dreams,
Cindy


