Thursday, June 30, 2011

Funnel Cakes


This recipe will be a favorite for kids of all ages.  When I was in high school, my Mom would make funnel cakes for my friends when we would hang out at our house during the summer.  We have also been making these for the 4th of July for several years now.  To keep the tradition going, I will post my recipe and hope that you too will enjoy it and get as many wonderful memories as I have!


Yield: 6-8 Funnel Cakes

3 cups of flour
2 tsp baking powdered
1/2 tsp salt
3 cups milk
4 T orange or lemon juice
Oil for frying
Powdered sugar, cool whip, fresh berries for topping

Mix ingredients together in a bowl.  Batter will be similar to pancake batter but a little more runny. 


Transfer some batter into a glass measuring cup to help pour into pan.

Heat 1/2 in deep oil in a skillet on medium high heat.  Test to check if oil is hot enough by dripping some batter into the oil.  If it sizzles and floats to the top, it is ready.


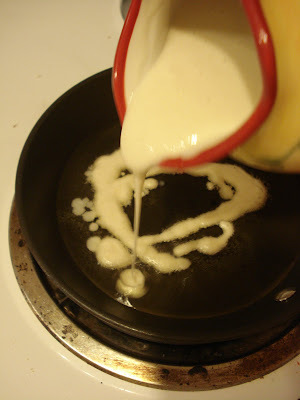
Carefully, drizzle batter into oil.  I make a couple circles around and then try to make star patterns with the batter to connect all the swirls together. 


Fry until golden brown.  Carefully turn the funnel cake over and fry the other side.

Remove from oil and set on paper towels to drain excess oil.


Sprinkle with powdered sugar while still warm.  Serve as is or add cool whip and berries for an extra special treat!


Last month, I wanted to make something unique for my Dad's birthday "cake" and knew he would enjoy a personal funnel cake topped with powdered sugar, cool whip, and strawberries!  When I brought the funnel cake over to him with the candles lit, his eyes opened wide and jaw dropped. Needless to say he was impressed and we all really enjoyed the sweet treat.


I wanted to upload this recipe before the 4th of July weekend!  This is one of my favorite holidays.  It is usually spent having BBQ's, corn on the cob, watermelon seed spitting contests, swimming, singing, and fireworks! Whatever your plans are, remember to say a prayer thanking God for protecting our beautiful country and blessing us to be a part of the Greatest Nation on Earth.  


Happy Birthday, America!!!


Sweet Dreams,
Cindy


Update on Key Lime Pie

I just posted and update on my Key Lime Pie recipe.  If you are going to any 4th of July parties and need a dessert to bring....this is THE one!

3 Ingredient Peanut Butter Cookies!

This is the simplest recipe ever for Peanut Butter Cookies!  So easy and they taste great!  Sometimes I add 1/2 tsp of baking soda, but it turns out great without it.  These are perfect to make around Christmas time when you are baking and want a variety of cookies!


Yield: 15- 30 cookies (depending on size)

1 cup Peanut Butter
1 cup Sugar
1 egg

Mix ingredients in your favorite large bowl.


Scoop tablespoon-size dough onto greased cookie sheet.


Use a fork to make a criss-cross pattern on top of the cookie.


Bake 350* for 10 minutes.

Remove from cookie sheet and cool.


Enjoy this special treat that took hardly any effort!


Sweet Dreams,
Cindy

Tuesday, June 28, 2011

Sweet Dinner Rolls

I have been using this dinner roll recipe for 2 years now and don't think I will ever find a replacement recipe that comes close!  These rolls are light and fluffy.  You can adjust the amount of sugar in the recipe to make them more or less sweet depending on your preference.  The 1/3 cup of sugar I use lends a sweetness to the bread similar to that of Hawaiian bread.  I make these rolls around Christmas time and they are perfect for leftover ham and cheese sandwiches!  


Yields: 20 rolls

1 cup warm milk 
1/4 cup melted butter
2 tsp (or 1 envelop) yeast 
1/3 cup sugar
1 egg
1 tsp salt
3 1/4 cup flour

Combine Milk, Butter, Yeast, and Sugar in mixing bowl. Cover with towel or plastic wrap and let proof 10 minutes.

Add in Egg, Salt, and Flour.  Knead with dough hook in Kitchen Aide for 5 minutes on level 3.  Or knead by hand for 10 minutes.  

Divide dough into 20 balls and place in greased 9 x 13 casserole dish.  Cover with plastic wrap and let rise until doubled in size. 

Remove plastic wrap.  Bake at 375 for 15 to 20 minutes or until golden brown.

Remove from oven.  Brush tops with melted butter (optional) and let cool. 

Enjoy the smell of homemade bread throughout your home!!!


Sweet Dreams,
Cindy

Monday, June 27, 2011

Marinated Roasted Red Peppers

Every time my husband and I visit his parents, my mother-in-law has a beautiful spread of Italian food waiting for us.  It usually consists of an anti-pasta platter with cheeses, salami, pepperoni, prosciutto, marinated olives, shrimp, Italian bread, and marinated roasted red peppers.  It all tastes wonderful, but I especially love the marinated roasted red peppers.  They make an ordinary sandwich taste out of this world amazing!

Since we live 10 hours away and don't have any Italian deli's nearby, I have searched for and tried a number of recipes trying to get my red peppers to taste like the one's my Mom serves. 

Here is my simple yet flavorful recipe:

Yield:  2-3 cups (plenty to serve at a dinner party of 4 and still have leftovers for lunches that week)

3-4 large red peppers
3 Tbsp olive oil
1 Tbsp balsamic vinegar
1/2 tsp Italian seasoning
1/2 tsp garlic powder
salt and pepper to taste

Cut peppers in half long ways.  Remove seeds and membrane, then place on cookie sheet skin side up.

Broil on High for 5 to 8 minutes or until skin on peppers is black.  (You will want as much skin to turn black as possible so that it will be easier to peel off later)

(The right side of this pepper was a lot easier to peel than the left since the skin was more burnt)

Remove peppers from cookie sheet and place in brown paper lunch bag.  Fold down top and allow the peppers to rest for 10 minutes.  


Open up bag and remove the peppers, being careful since they are still hot.  Peel off the skin and cut peppers into pieces.  (Cut the size large or small depending on how you plan to serve them--smaller if serving with crackers as an appetizer and larger if going on sandwiches.)

(Skin off versus skin on) 

Place cut peppers in bowl and mix with Oil, Balsamic Vinegar, Italian Seasoning, Garlic Powder, Salt and Pepper.  Cover and let them marinade in the refrigerator at least 3 hours.  They are great right away but taste even better the next day!!


I really hope you try this recipe.  I love serving this to guests and it always impresses!


Sweet Dreams,
Cindy

Friday, June 24, 2011

Cream Puffs

This dessert may sound fancy, but it is made with simple ingredients and it only takes a few quick steps before you are serving these to friends at a party!  These Cream Puffs would be perfect to serve at a Bridal or Baby Shower.  

There are a couple possibilities for the filling.  You could use pudding (such as the filling I used for my Banana Cream Pie), a scoop of ice cream, or whipped cream.  I took a container of cool whip and folded in some chopped fresh strawberries to make a fruity cream filling.  The result was a light and fluffy dessert with a sweet taste of strawberries!


Yields: 10 small Cream Puffs (Serves 5: 2 cream puffs per person)

1/2 cup water
1/4 cup butter
1/2 cup flour
2 eggs
cream puff filling of choice
powdered sugar for sprinkling

In a saucepan bring Water and Butter to a boil.  


Add Flour.  Stir until smooth ball forms.  Take off heat and let stand 5 minutes.  


Add 1 egg at a time beating well after each.  Combine until smooth.


Drop by rounded tablespoonful 3 inches apart onto a greased cookie sheet.  (Just like you would when making chocolate chip cookies).  


Bake 400* 30-35 minutes.  Around 25 minutes poke a hole into the top of each cream puff so they will not collapse.

Remove from rack and allow to cool. 


Slice the cream puffs in half.  Place a scoop of filling onto the bottom of the cream puff.  Place the top on the filling and sprinkle with powdered sugar.


Sweet Dreams,
Cindy

Thursday, June 23, 2011

~Banana Cream Pie~

I made this pie when my parents were visiting and we all agree it is a keeper!  Very basic ingredients and a little stirring time on the stove is all it takes to make this classic pie!!!  


Yield: One 9 inch pie (6-8 servings)

3/4 cup sugar
1/3 cup flour
1/4 tsp salt
2 cups milk
3 egg yolks beaten
2 Tbsp butter
1 1/4 tsp vanilla
2 bananas sliced

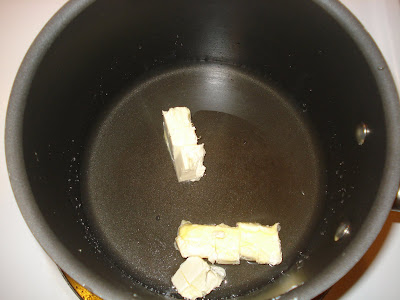
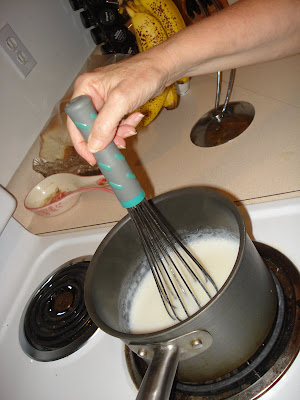
Combine Sugar, Flour, Salt, and Milk in saucepan.  Stir over medium heat. Bubbles will form.  Keep stirring another 2 minutes, then remove from heat.  


Add a couple spoonful’s of the hot mixture to beaten egg yolks to slowly bring them to temperature (This will prevent any scrambled eggs in your delicious pudding).  Add to the rest of the hot mixture and return to stove.


Cook while stirring constantly for 2 minutes.  Turn off heat.  Add Butter and Vanilla.  Mix until smooth (at least 5 minutes to allow the mixture to cool a bit).  


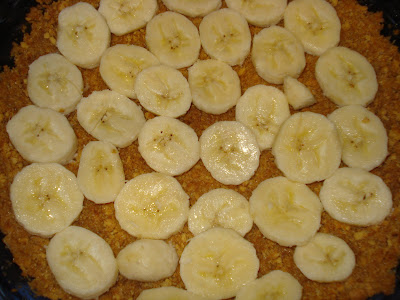
Place 1 sliced Banana over the pie crust. 


Pour the pudding on top.  Cool 3 minutes then cover with plastic wrap that touches the pudding to prevent any film from forming (not very tasty).  


Cool 10 minutes then transfer to refrigerator to chill for at least 1 hour. 

Serve with an additional sliced banana and whipped cream!


 This recipe would work out wonderfully if you want to serve it as banana (or even plain vanilla) pudding instead of a pie.  You could serve the pudding with some vanilla wafers and whipped cream for a very nice dessert!


Sweet Dreams,
Cindy